Merry Christmas to Everyone! Also an Announcement

Thursday, December 24, 2009
I know I've been gone for a little bit.  I've been busy with the holidays and everything.  I hope everyone has a wonderful Christmas or enjoys whatever holiday they may be celebrating.  What's important is that you spend this time of year with your family.  I'm very excited because I have had the majority of my presents bought since August.  I can't wait to see my family open them.

Anyway, I also have an announcement to make.  I am opening my own online kit club.  I have just finished all of my paperwork (lots of legal stuff to go through) and am in the process of putting together my kits.  I am pretty sure that I will have my first kit available mid to late January, just in time for Valentine's day.  As soon as I have sneek peaks I will post them.  Please spread the word.

Happy Holidays!

Lottery Ticket Christmas Card

Wednesday, December 16, 2009
My chorus had a secret Santa exchange and I decided to get some lottery tickets for my person.  Of course I wanted to keep practicing making cards, so I designed a card with little pockets to fit the tickets in.  I used the Martha Stewart edge punch for the little green border.  Hope you enjoy the card.

On the envelope I used rubons and then put glossy accents on top to make it look like brads.


Quartet Gifts 2

Sunday, December 13, 2009
This hot chocolate was done using:
Penny's Paper-Crafty Challenge Blog - Christmas Star
Crazy for Daisies - Twisted Thursday 36 (Sketch with Glitter or Bling)
Frosted Designs - Happy Holidays Challenge
Stampin' Sisters in Christ - "Treasures" (Bling)
Pile it On - Chip Chip


Quartet Gifts 1

So there are going to be quite a few posts today.  I have been cranking out some last minute cards/gifts and haven't had the chance to post them.  I know the best way to do this would be to post one a day, but quite a few of them are for challenges so I want to make sure they are listed.  So I hope you enjoy the high influx of posts.

The next few posts will have these cute little hot chocolate powder covers I am giving the members of my quartet for Christmas.  I got the idea from the Custom Crops video that My Pink Stamper was on.  I love the way the ribbon pulls out the packet without actually being attached.  This also uses the sketch from Delightful Sketches - Sketch 13.


A Whole Bunch of Challenges

Here is my gift card holder I designed for a Secret Santa exchange I am in Christmas Eve.  This year I didn't really want to resort to gift cards.  I also wanted to make cool tags, or wrapping, or something like that since my new addiction to all things paper crafting.  This is a little matchbook from the Fabulous Finds cartridge.  It was a little difficult to put together with only one set of pages on the inside, but I thought it came out pretty well.  This is my entry for the Gypsy Spot Bag It, Box It, Wrap It challenge.  Also the Frosted Designs Happy Holiday Challenge, Stampin' Sisters in Christ Challenge #17 which is to bling your card, Whiff of Joy Sparkle Sparkle Sparkle, and last but not least, Pile It On Challenge 28 Chip Chip.

I used the DCWV Christmas Package from this year.  I love the double sided paper.  It is just gorgeous.

The present is chip board out of the DCWV Christmas package.  I really wanted to use these red pearl brads to hold it together, but they just didn't hold the page in correctly.

Giving the gift of reading.

Simon Says Stamp - Let it Snow, Three Clover Designs - Blue, White, and Silver, and Pile it on - Tinsel Town

Thursday, December 10, 2009
This card is a little different for me.  I think it has a class that comes from it's simplicity.  Anyway, I'm exhausted so I'm just going to post the card.  Simon Says Stamp is doing Let it Snow, Three Clover Designs is doing a color challenge: blue, white and silver, and Pile it On is doing Tinsel Town meaning use glitter.  Of course, I used my Diamond Stickles.

SSHP10 - Christmas Flowers, "Just Us Girls" Challenge 10 - Sketch, and Practical Scrapper - Anything Christmas

Sunday, December 6, 2009
This little gift box is for a Secret Santa swap I am part of on Christmas Eve.  I used the sketch from "Just Us Girls"  and the challenge over at Saturday Spotlight With Hidden Potential was to use a flower on a Christmas card.  Also, Practical Scrapper has a challenge for anything Christmas.  This isn't a card, but I thought it would qualify since it is Christmas packaging.  I used the Winter Woodland cartridge to cut the pointsettas and red glitter brads for the center.  The packaging is a wooden box I bought from the dollar store and used spray adheisive to adhere the paper to it.  Enjoy!


Sorry for the overexposer.  I just didn't seem to get good pictures this time around.

Glass Etching Tutorial

Hey everyone!  This is my first tutorial and I am covering how to do glass etching.  If you have the right tools this can be a very simple mess free (seriously) project.  I use the 
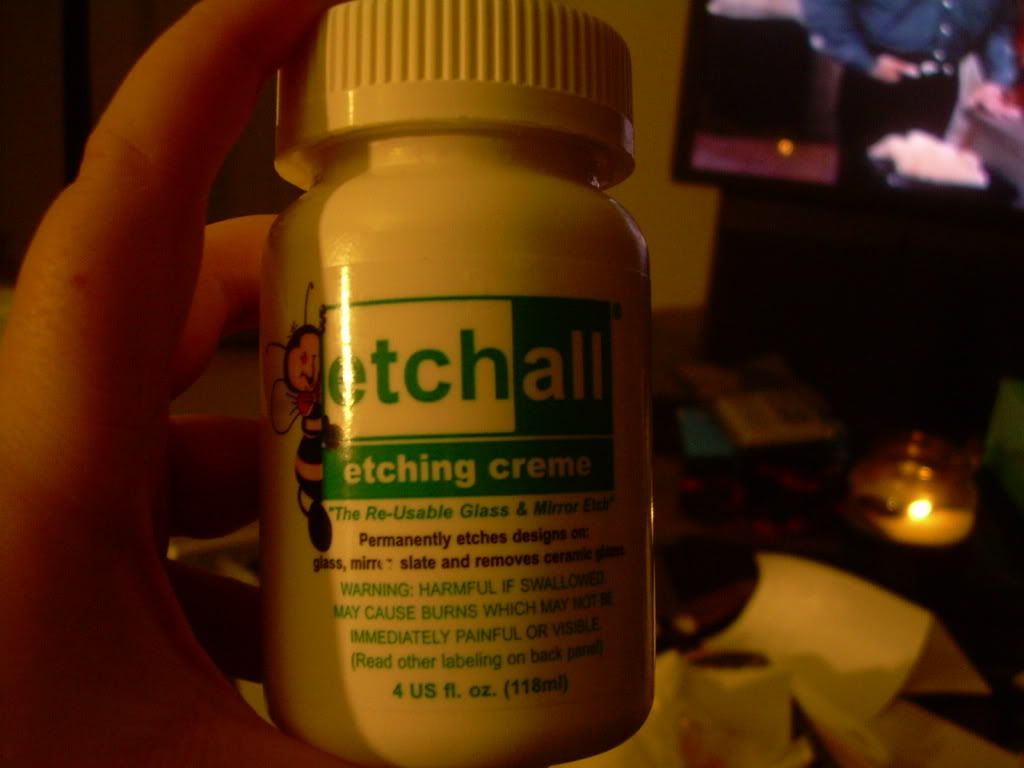
Etch-All etching creme I bought at CHA.

This stuff is pretty great because it doesn't have a smell, so you can do the etching wherever you would like, and reusable, so you can dump back in a lot of what you put on the glass to reuse at a later date.

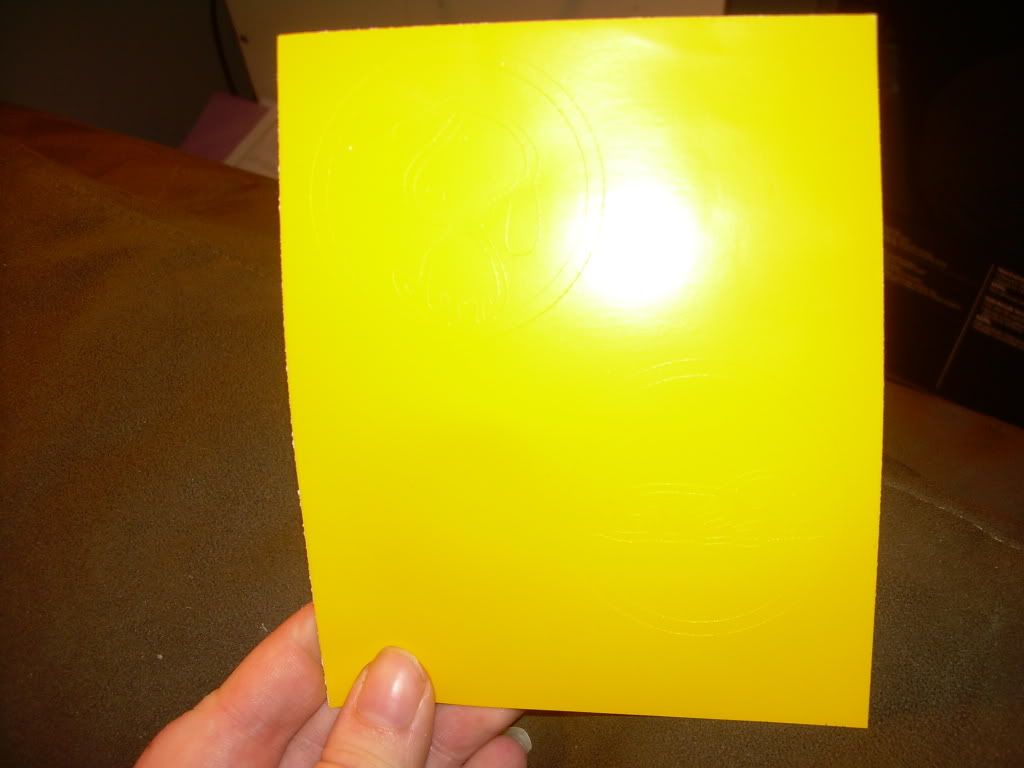
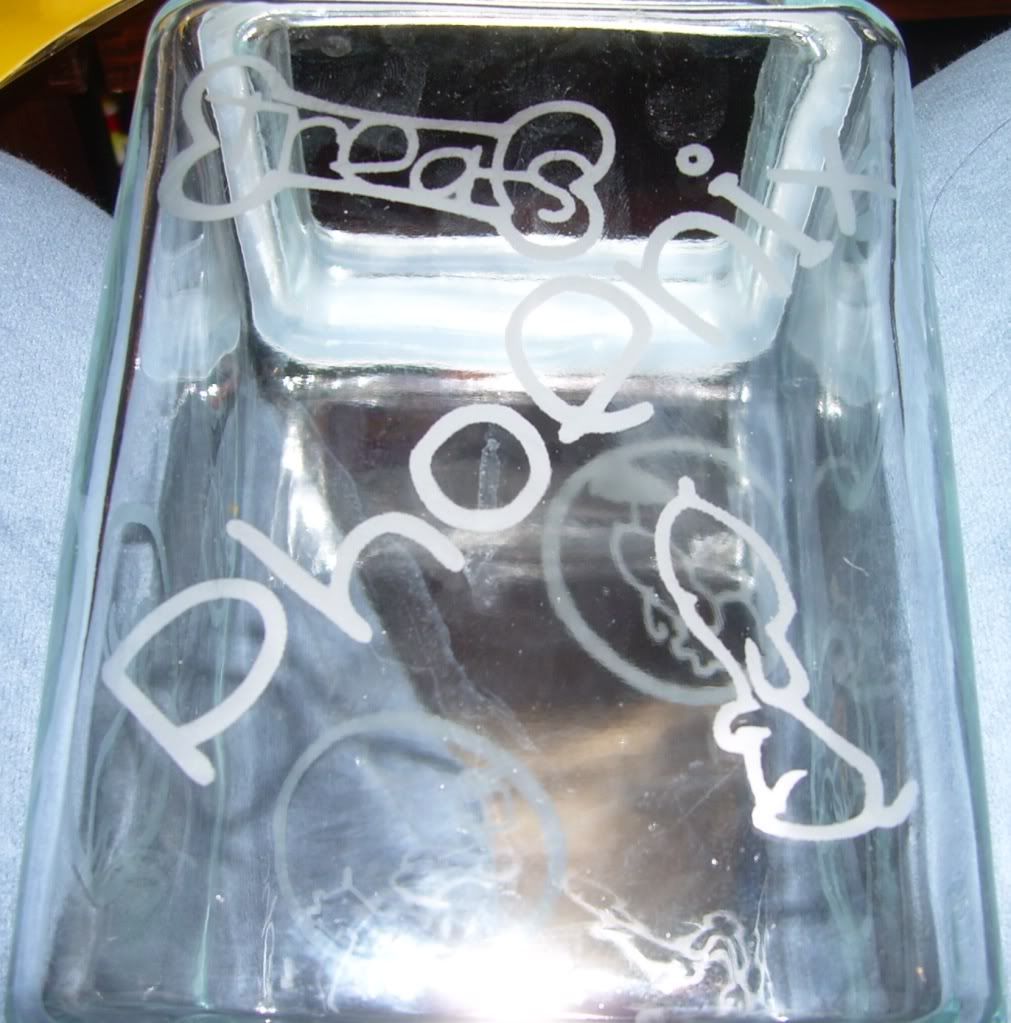
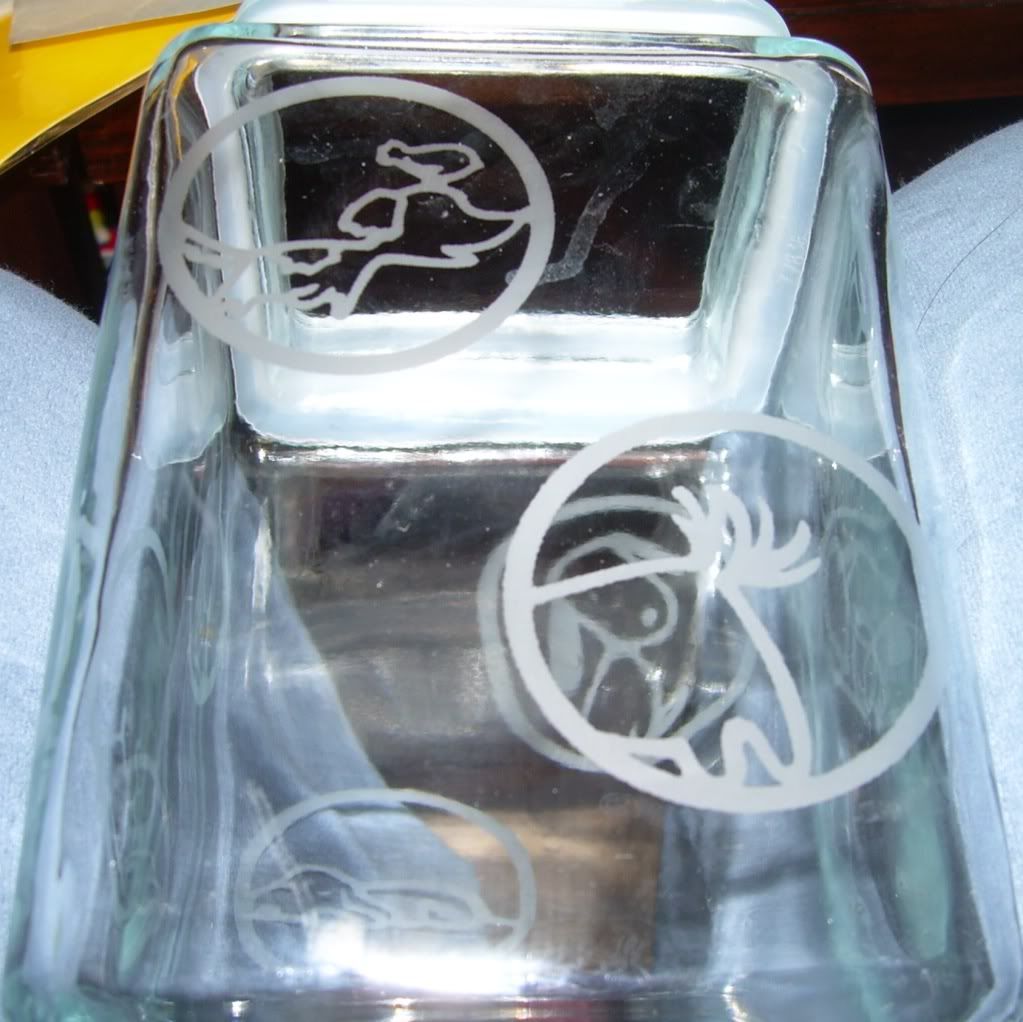
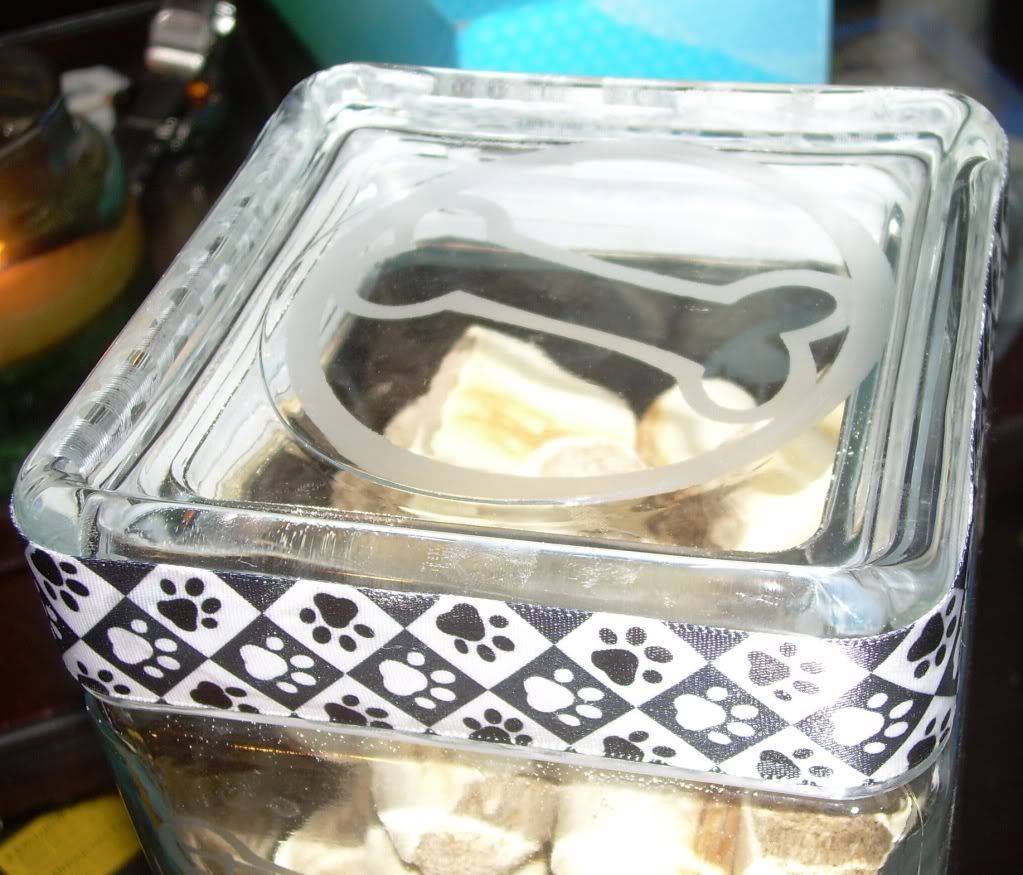
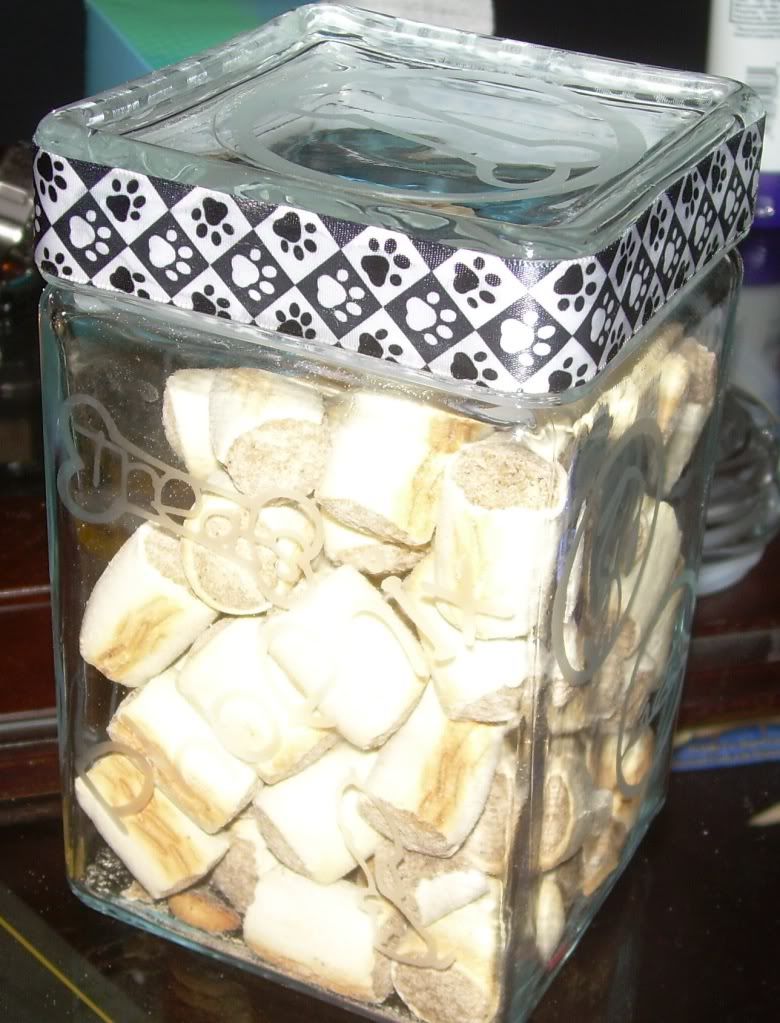
This project is a treat jar for my dog, Phoenix.  I used the Paper Pups and All Mixed Up cartridges and my Gypsy to plan out where the cuts would go on the side of the jar.  I also used yellow vinyl from Avery that I also bought at CHA.


It's kind of hard to see, but this the the vinyl with the cuts in it.  Set your cricut with blade depth 2 and pressure Low.  This cuts just the vinyl layer so you can peel the entire thing off the cricut mat still on the backing sheet.

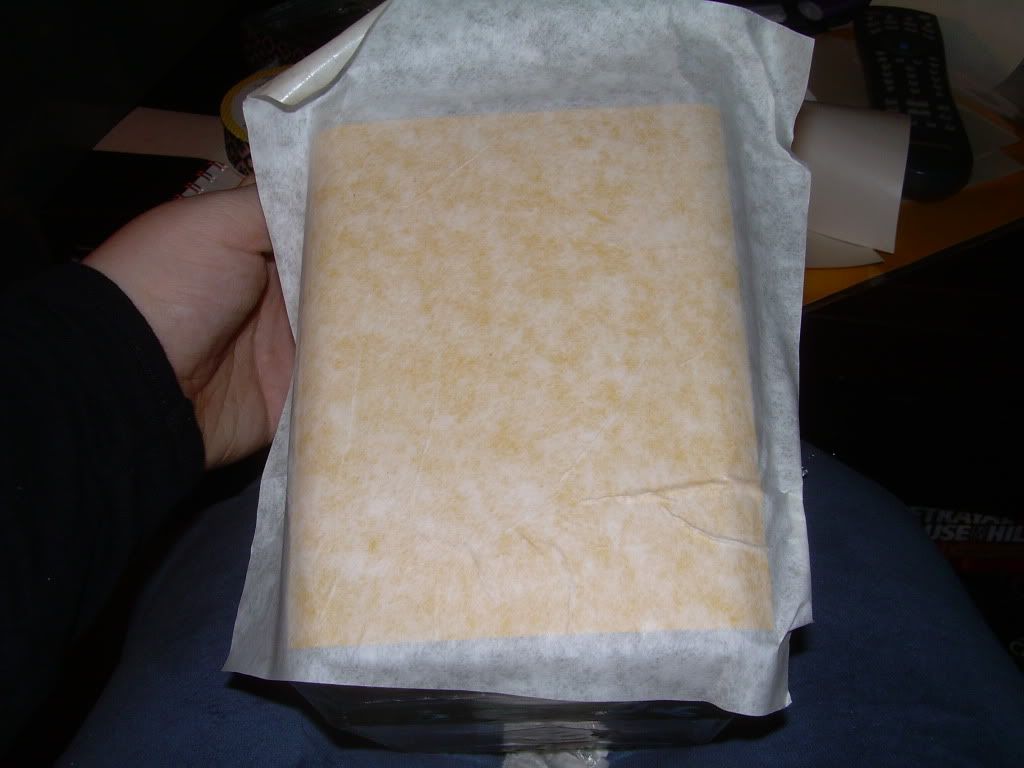
Peel the backing sheet off of a piece on contact paper and smooth contact paper on top of the entire vinyl stencle.  This step allows you to have very little areas removed or kept in your etching process.  If this is confusing to you, it should clear up in the next couple of steps.

Now peel the backing sheet of the vinyl off.  You should now have a sheet of vinyl, sticky side exposed, attached to a piece of contact paper.

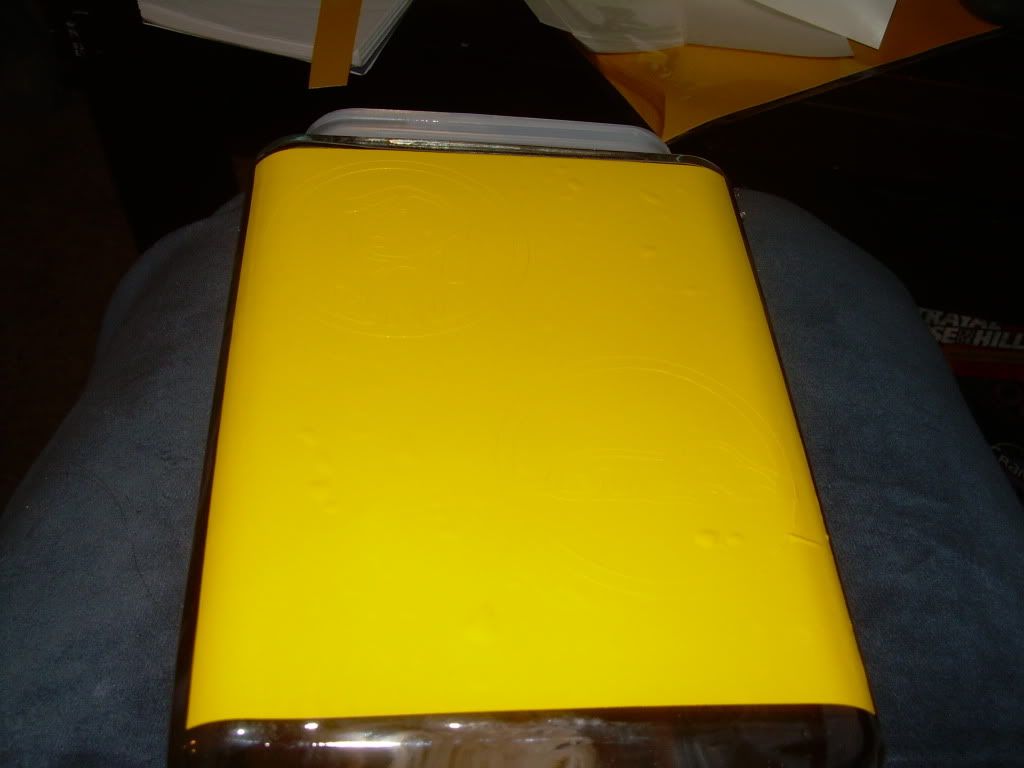
Place the vinyl stencil where you would like the final design to be.  With the contact paper still on, rub over the entire area to smooth out wrinkles.  Etch-All sell a starter kit with a jar of creme, a spatula, and a pick.  A clean spatula works really well for this step.

Peel off the contact paper.

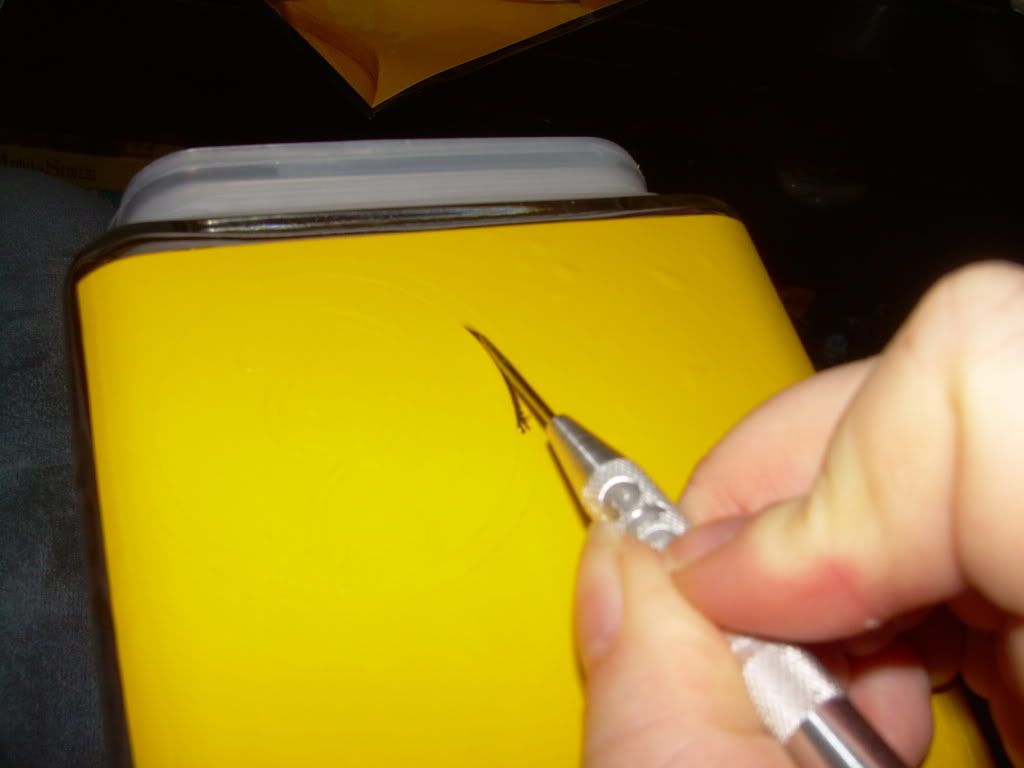
Use pick to remove areas of the stencil that you would like to be etched.  The pick is basically a paper piercer.

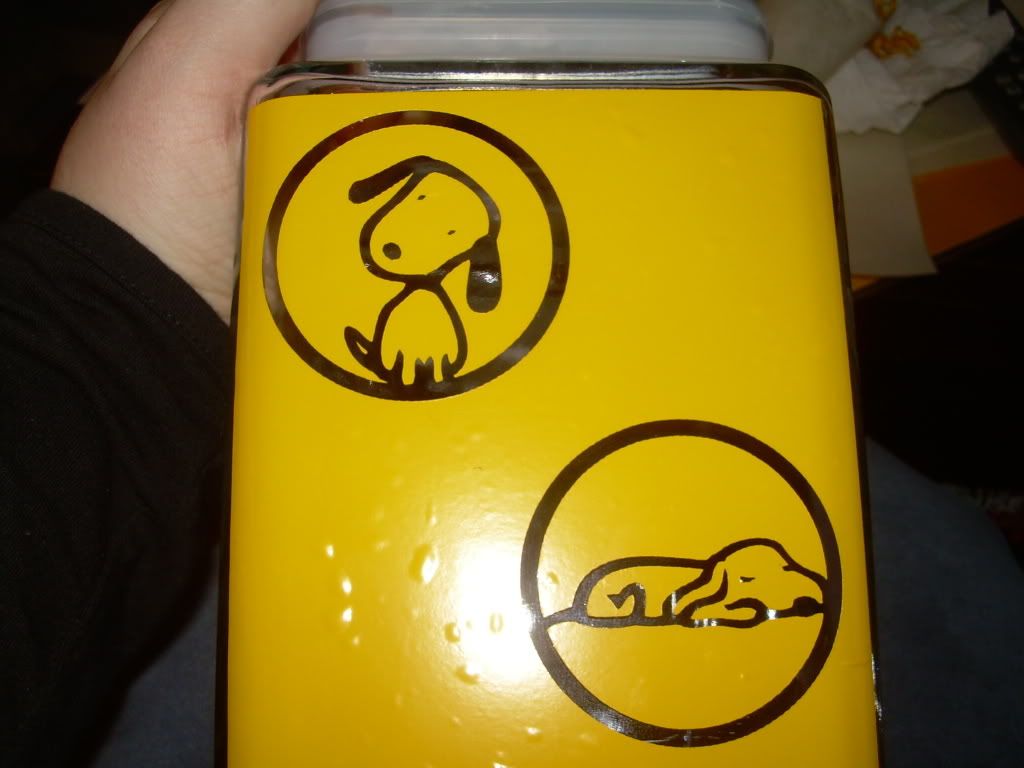
As you can see, this process prevents the warping of the vinyl stencil in placement so the cuts look just like they would if you had done them on paper.

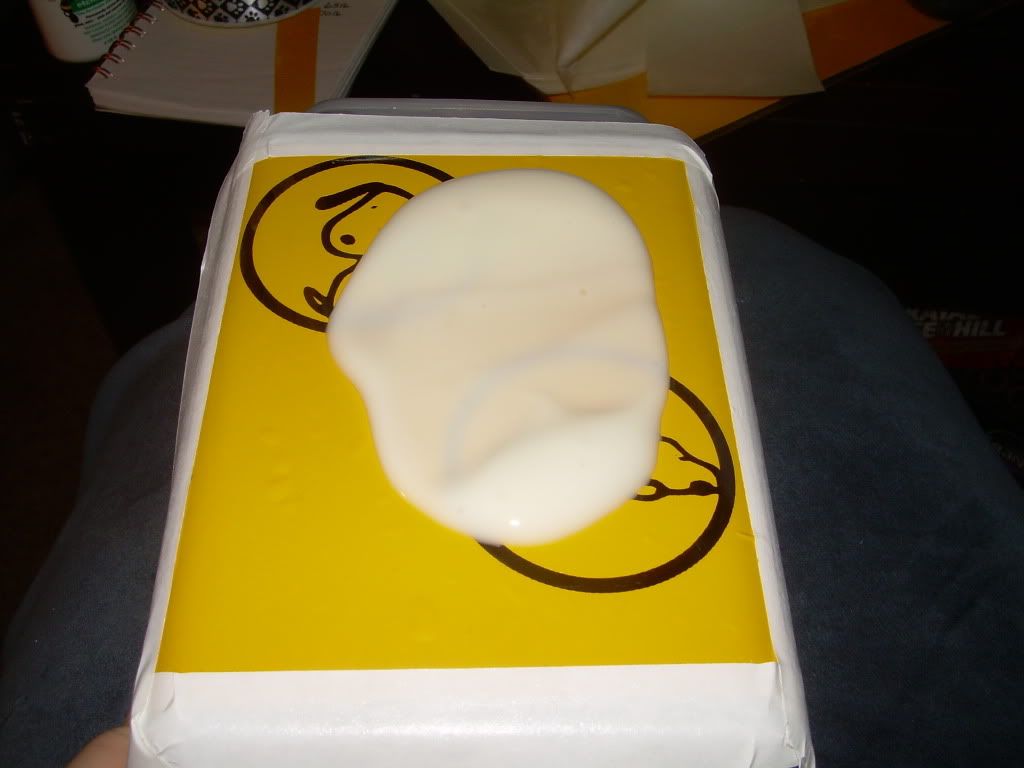
Tape off any glass that you would not like to be etched.  The most important thing is to make sure the edges of the stencil don't have any air bubbles or the etching will not be crisp.  Put a liberal amount of the etching creme on the stencil.  Don't be stingy because you can reuse the creme you have on the stencil.

Spread out creme with spatula and let sit for 15 minutes or as long as you feel is necessary.  The etching creme bottle you are using will tell you the recommended range.

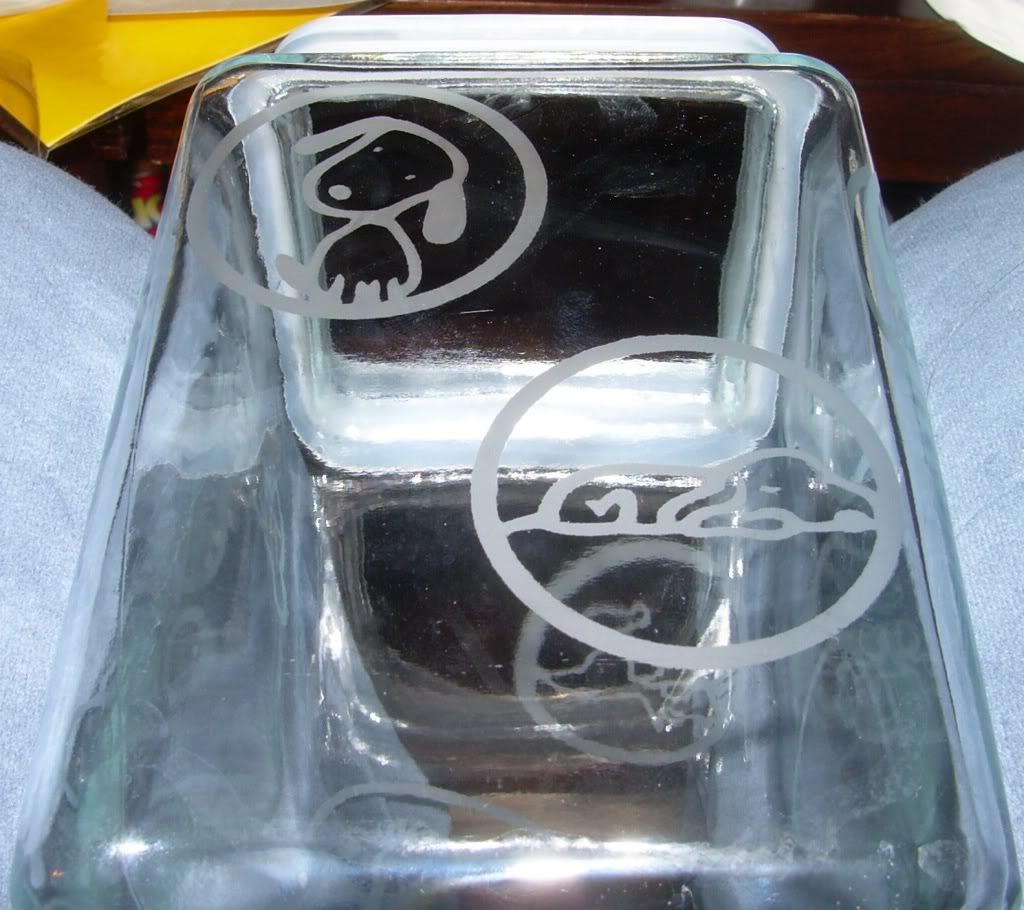
With the spatula, scrape the excess creme back into the jar.  Rinse the jar in warm water with the stencil still on.  Remove the stencil and rinse again.  If you are doing other sides of the jar or another stencil on the same side make sure the jar is completely dry.

Finished Project


Cricut Cardz Challenge #4, There She Goes 31-Color Challenge, Lexi's Creations Challenge #2, Cupcake Craft Challenges #68

Thursday, December 3, 2009
So this card qualifies for quite a few challenges this week (I wish it also qualified for Pile it On, but oh well).  I worked all day on it so I want to get as much mileage out of it as possible.  Here is my step card.  Cricut Cardz wanted a step card, There She Goes wanted red, green, blue and neutrals, Lexi's Creations wanted a shaped card, and Cupcake Craft wanted red and green.

I wanted to go for a depth perception type card where Santa is right next to you, Mrs. Claus is looking on from the distance, and Santa's cottage is way in the background.  I think it work out pretty well.

Santa, Mrs. Clause, trees, and the Santa sack were cut using the Paper Doll Dress Up cartridge, the saying "The magic of Winter" and the cottage were cut from Winter Woodland.  The cottage actually has a second story so I layer the house all together and then cut off the second story.

It's a little hard to see, but Santa's gloves, belt, and boots were covered with crystal accents to make them look like patten leather.  The dark green trees are outlined with Diamond Stickles.

Mrs. Claus (sorry for the focus issue) has faux stitching on her apron and crystal accents on the dot on her dress to give her a little shine.

Like I mentioned before, this house is actually two stories when cut out with the cricut, but I cut off the second story.  The snow on the roof was covered with crystal accents to give it some shine.  The striped trees I cut out at 1 3/4" and did an autofill.  I wanted the look of a forest.

Finally the greeting has faux stitching and diamond stickles on the snowflakes.

Rochester Rhapsody ICC Picture

Here is the picture of my Harmony Inc. Internationals layout with the chorus group picture added.  Enjoy!


Was Gone For the Holidays

Wednesday, December 2, 2009
Sorry for not having a project recently.  I'm hoping to finish one up today.  I went to my parents' house for Thanksgiving and was going through massive amounts of crafting withdrawl.  I also started a new set of classes this week so things are just settling back into a groove.

Also I want to send a big Thank You to Nilda from the Gypsy Spot for sending me my gift card for Michael's (YAY!).  She also sent me this really cute Thank you card.  I will also be posting what I buy with the card 'cause I'm so excited.

Hopefully I'll have a project posted for you later today.  I've got a whole bunch of ideas backed up.